Filtering the Comparison Results

The Results to Show Filters area
A filter hides specific files and subfolders in FolderMatch based on criteria you set.
|
(Do not confuse this filtering with the Include/Exclude filters which determine which items to include in a comparison/synchronization.)
•Show Microsoft Word documents updated in the last week •Show files and subfolders that differ •Show photos with names starting with "DNC" •Show all files larger than 0 bytes
|
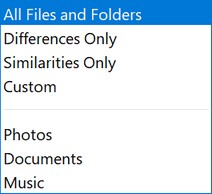
To filter the comparison results from the Results to Show toolbar, you either 1) select a filter from the list or 2) create your own custom filter.
|
| How to see details about the current filter |
The Filter Information Area shows status information about the current filter. It's the blue-colored section beneath the Filters Toolbar.
•No Filter Active: When no filters are applied, a regular filter image appears with text explaining how to select a filter.
•Filter Active: When filters are applied, the filter image will show a green dot, and text will indicate that filtering is active. Details about the current filters will be provided.
Buttons representing each filter criterion applied will appear at the bottom of the Filter Information Area. These are the filter status buttons. One button appears for each type of filter criterion being applied. For example, three buttons are shown when you filter based on Type, Date, and Result.
|
1.Add Criteria •Steps: Select the new criteria from the Filter Criteria drop-down menus. •Example: To add a Date filter, choose the Date menu and select the new criteria.
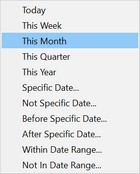
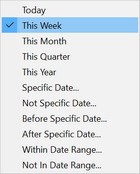
2.Change Criteria Details •Steps: Update the details of existing filter criteria from the Filter Criteria drop-down menus. •Example: Change the Date criteria from “This Month” to “This Week” by selecting the new option from the Date menu.
3.Remove Criteria •Steps: Click on the corresponding Filter Status button to remove a criterion. •Example: To remove the Size filter, click on the Size filter status button. A red X will appear when you hover over the button.
4.Remove All Filters •Steps: Click on each filter status button to remove them individually or select “All Files and Folders” from the Filters List to quickly remove all filters.
|
To save a custom filter, press the Save button
|
To delete or rename a filter, press the Maintain Filters List button
|


